Creating a Project
Learn how to create a project before uploading files. Projects store your files and preserve your progress.
Last updated 18 days ago
A project holds everything for one request: the files you upload, your redactions and your progress. Create one for each request you answer.
Then add the request details: who made the request and who it is about. RedactBox will not suggest their names for redaction.
Create the project
On your dashboard, click New project.
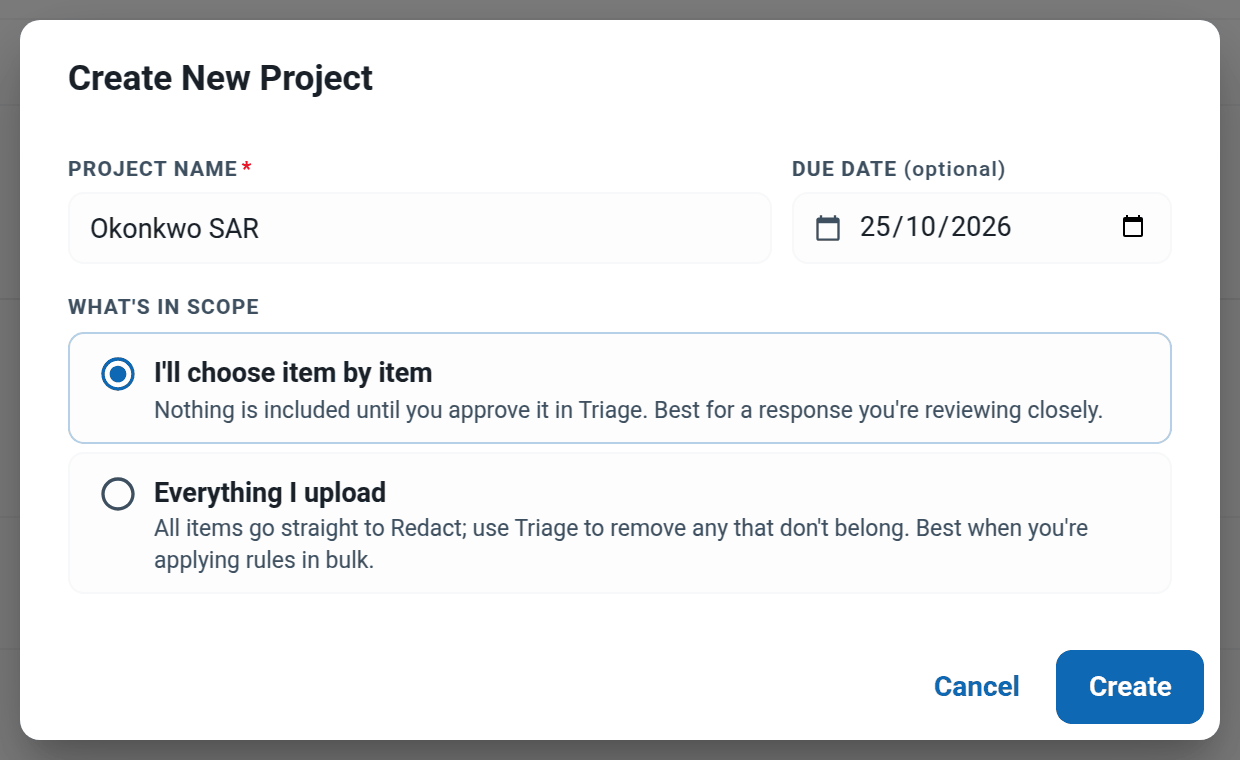
Type a Project name you will recognise later, such as the requester's surname and your reference.
Add a Due date if you have one. It is optional, and projects due soonest come first on your dashboard.
Under What's in scope, choose I'll choose item by item to approve each item in Triage, or Everything I upload to send everything straight to Redact. See Choosing what goes to Redact.
Click Create. The project opens, ready for your files.
Add the request details
A new project opens with a strip across the top: Who must stay in? Click Add request details.

Click Add a person and type their name.
Set their role. It starts as Must stay in; change it to Made the request or The request is about them.
Under Addresses, add every email address you know for them, old ones included.
Under Also written as, add any other spelling, such as a nickname or a previous surname.
Click Done and add the next person. Nothing is saved until you click Save.
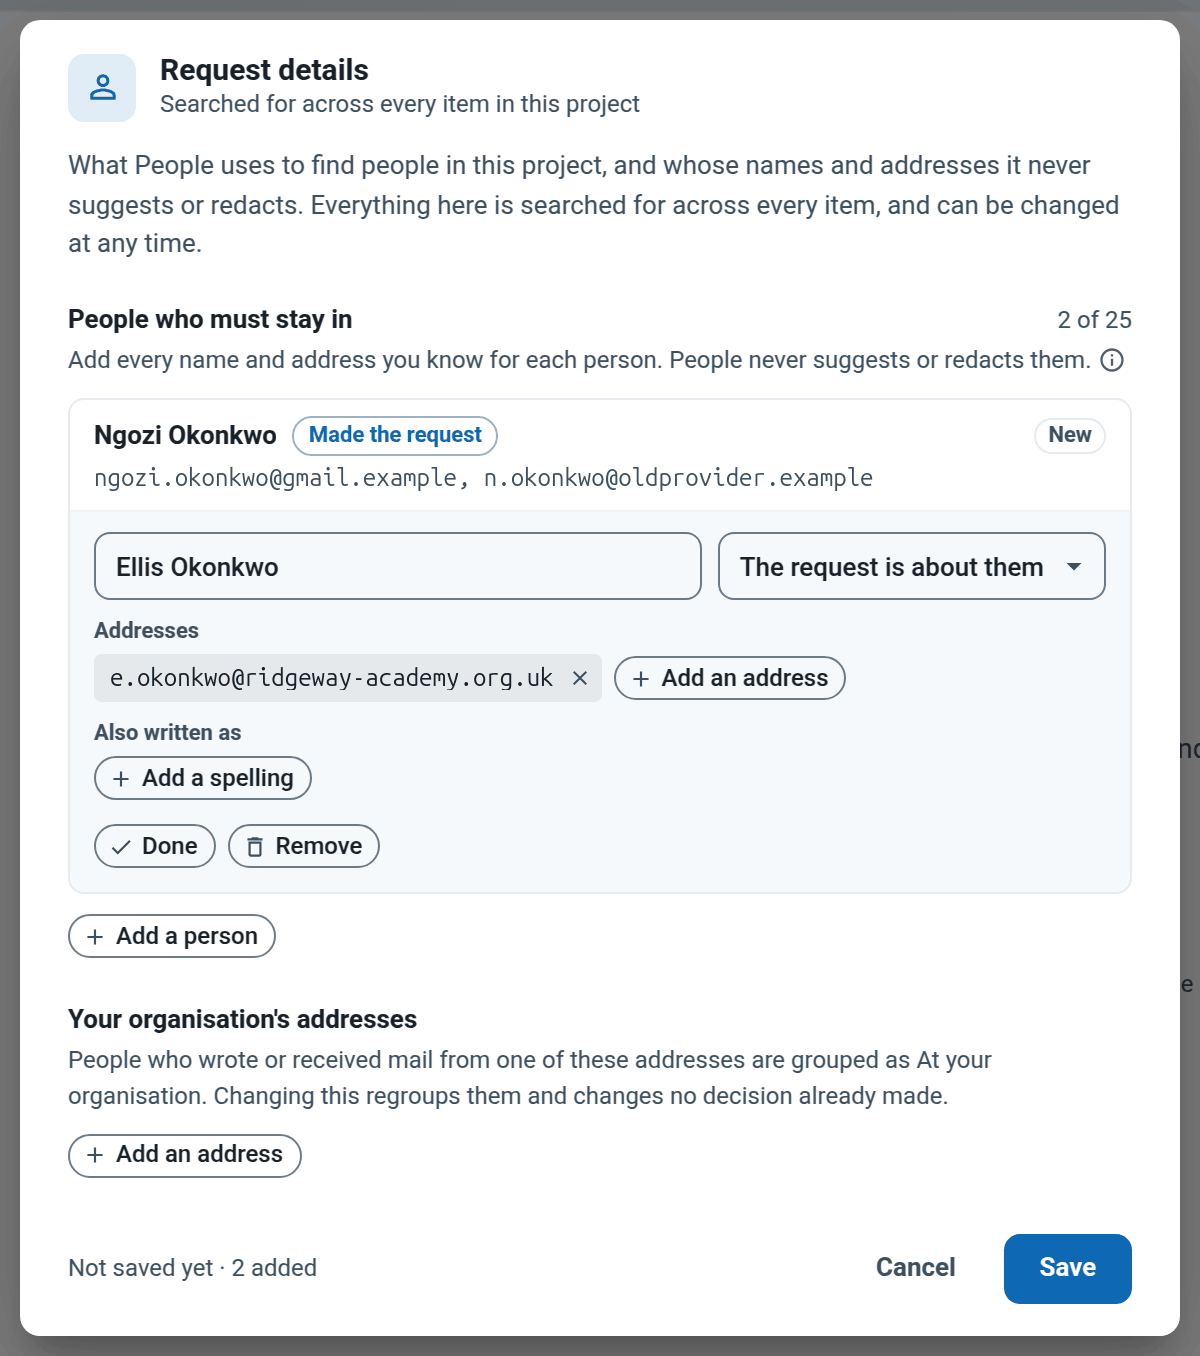
RedactBox looks for these names and addresses in every item. It never suggests them for redaction, and no decision in People and identifiers blacks them out. People lists them under Must stay in.
Note: Search & Redact, word lists, text you select, boxes you draw and identifier runs (such as phone numbers) can still cover them. Keep these names out of your word lists, and check before you export.
Leave Your organisation's addresses, at the bottom, until your files are in. It only sorts people into groups in People and identifiers.
Not ready yet? Click the × on the strip. Nothing is lost, and you can add the details later.
Change them later
From your dashboard. Click the three dots on the project's row and choose Request details. Inside a project, Home at the top left takes you to your dashboard.
Inside the project. Click Tools, then Request details.
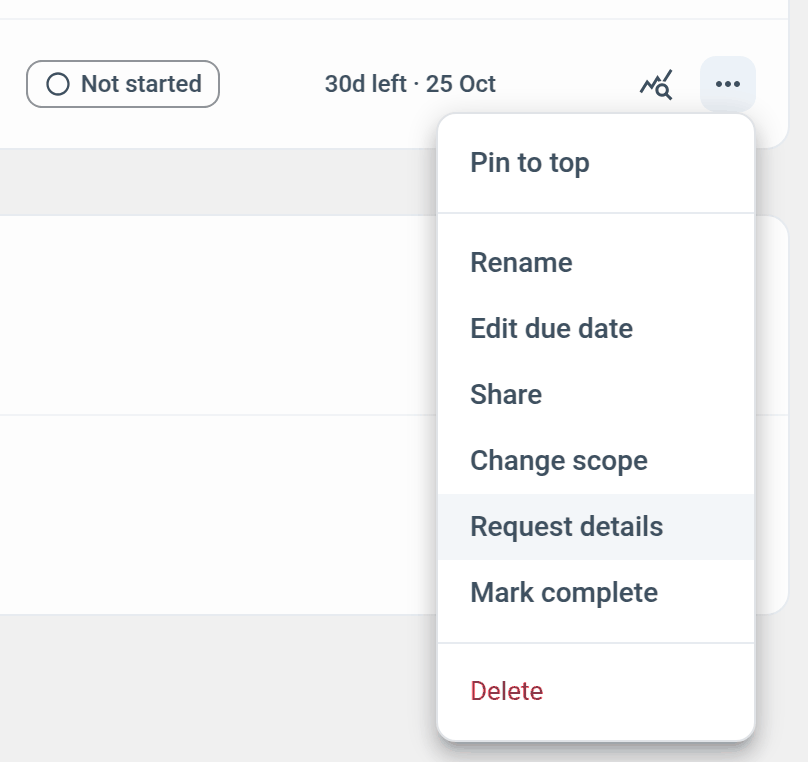
Only the project owner can change the request details. Anyone else on the project can open them from Tools to see who stays in. The same menu on your dashboard also renames the project, sets its due date and changes its scope.
Example: a parent's request about her son
Ngozi Okonkwo has asked her son's school for everything it holds about Ellis, who is in Year 9.
Create a project called Okonkwo SAR, due one month after the request arrived. Choose I'll choose item by item, because the staff mailboxes hold far more than Ellis's records.
Click Add request details. Add Ngozi as Made the request with ngozi.okonkwo@gmail.example, and the old address she used before, n.okonkwo@oldprovider.example.
Add Ellis as The request is about them with his pupil address, e.okonkwo@ridgeway-academy.org.uk. Click Save.
Upload the mailboxes. In People and identifiers, Ngozi and Ellis are already under Must stay in. Other pupils, staff and outside professionals are yours to decide.
Was this helpful?
Still need help? Ask the team